
Creating glossaries and how to manage them
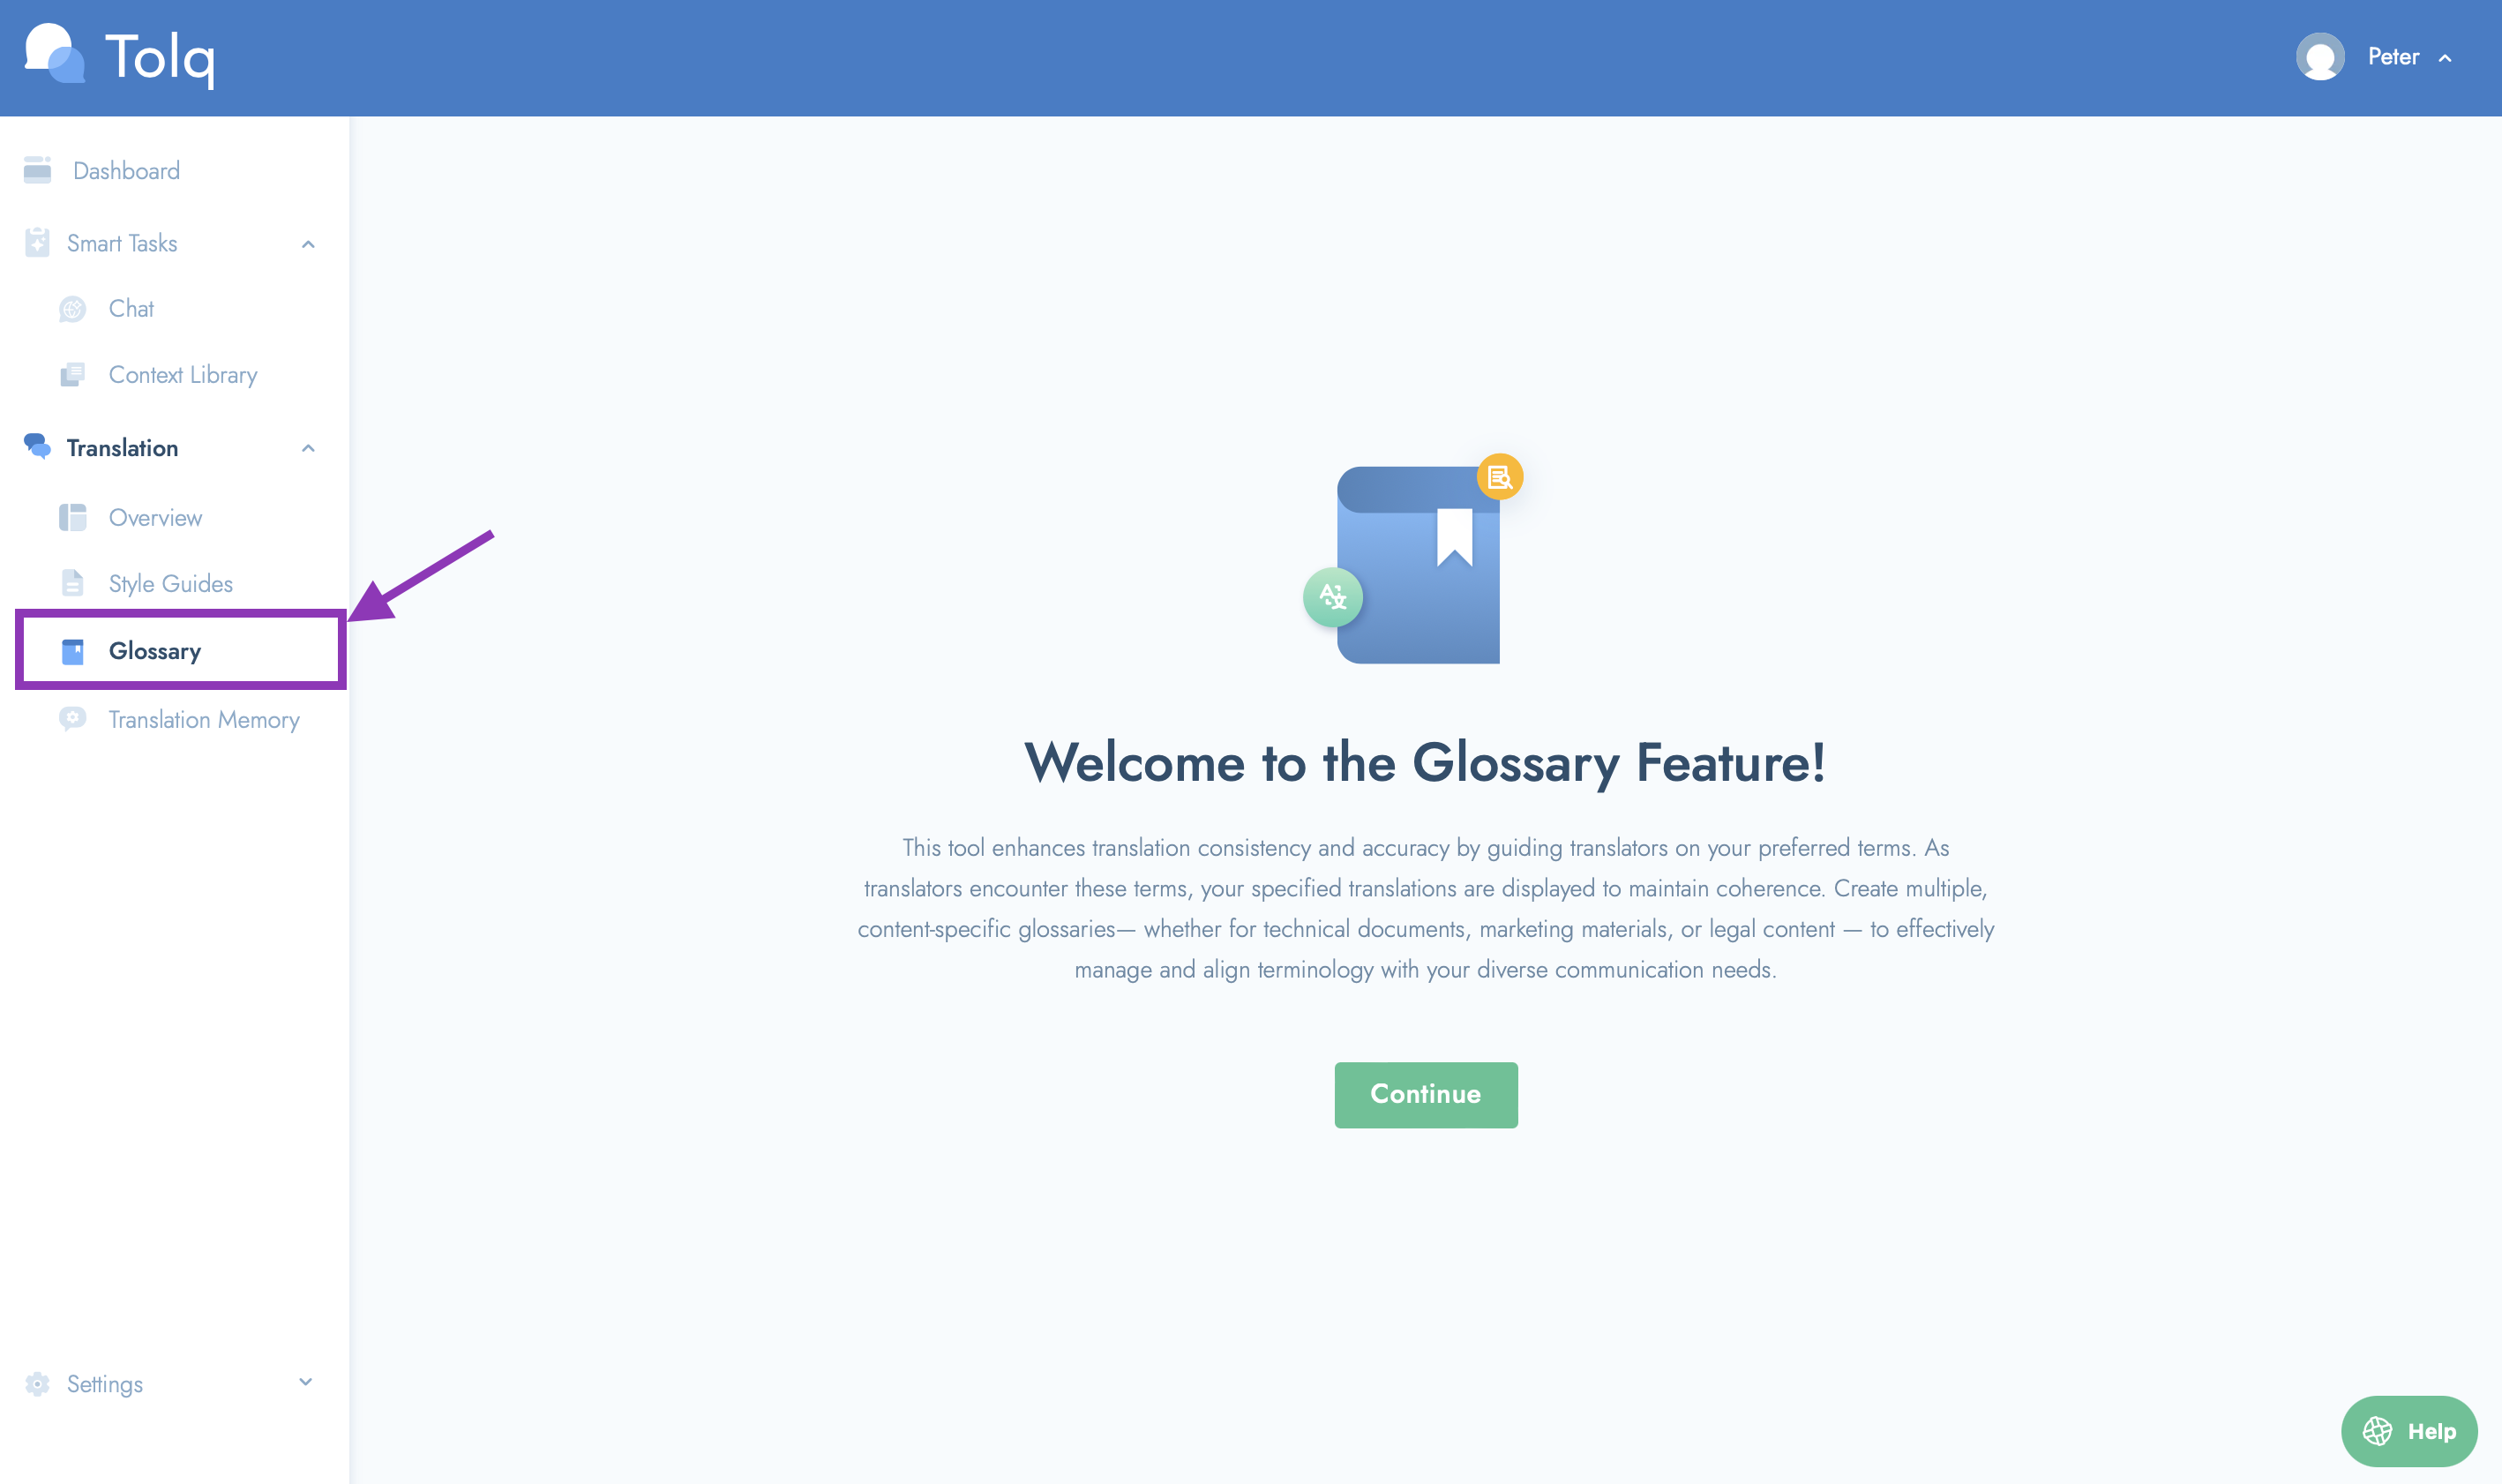
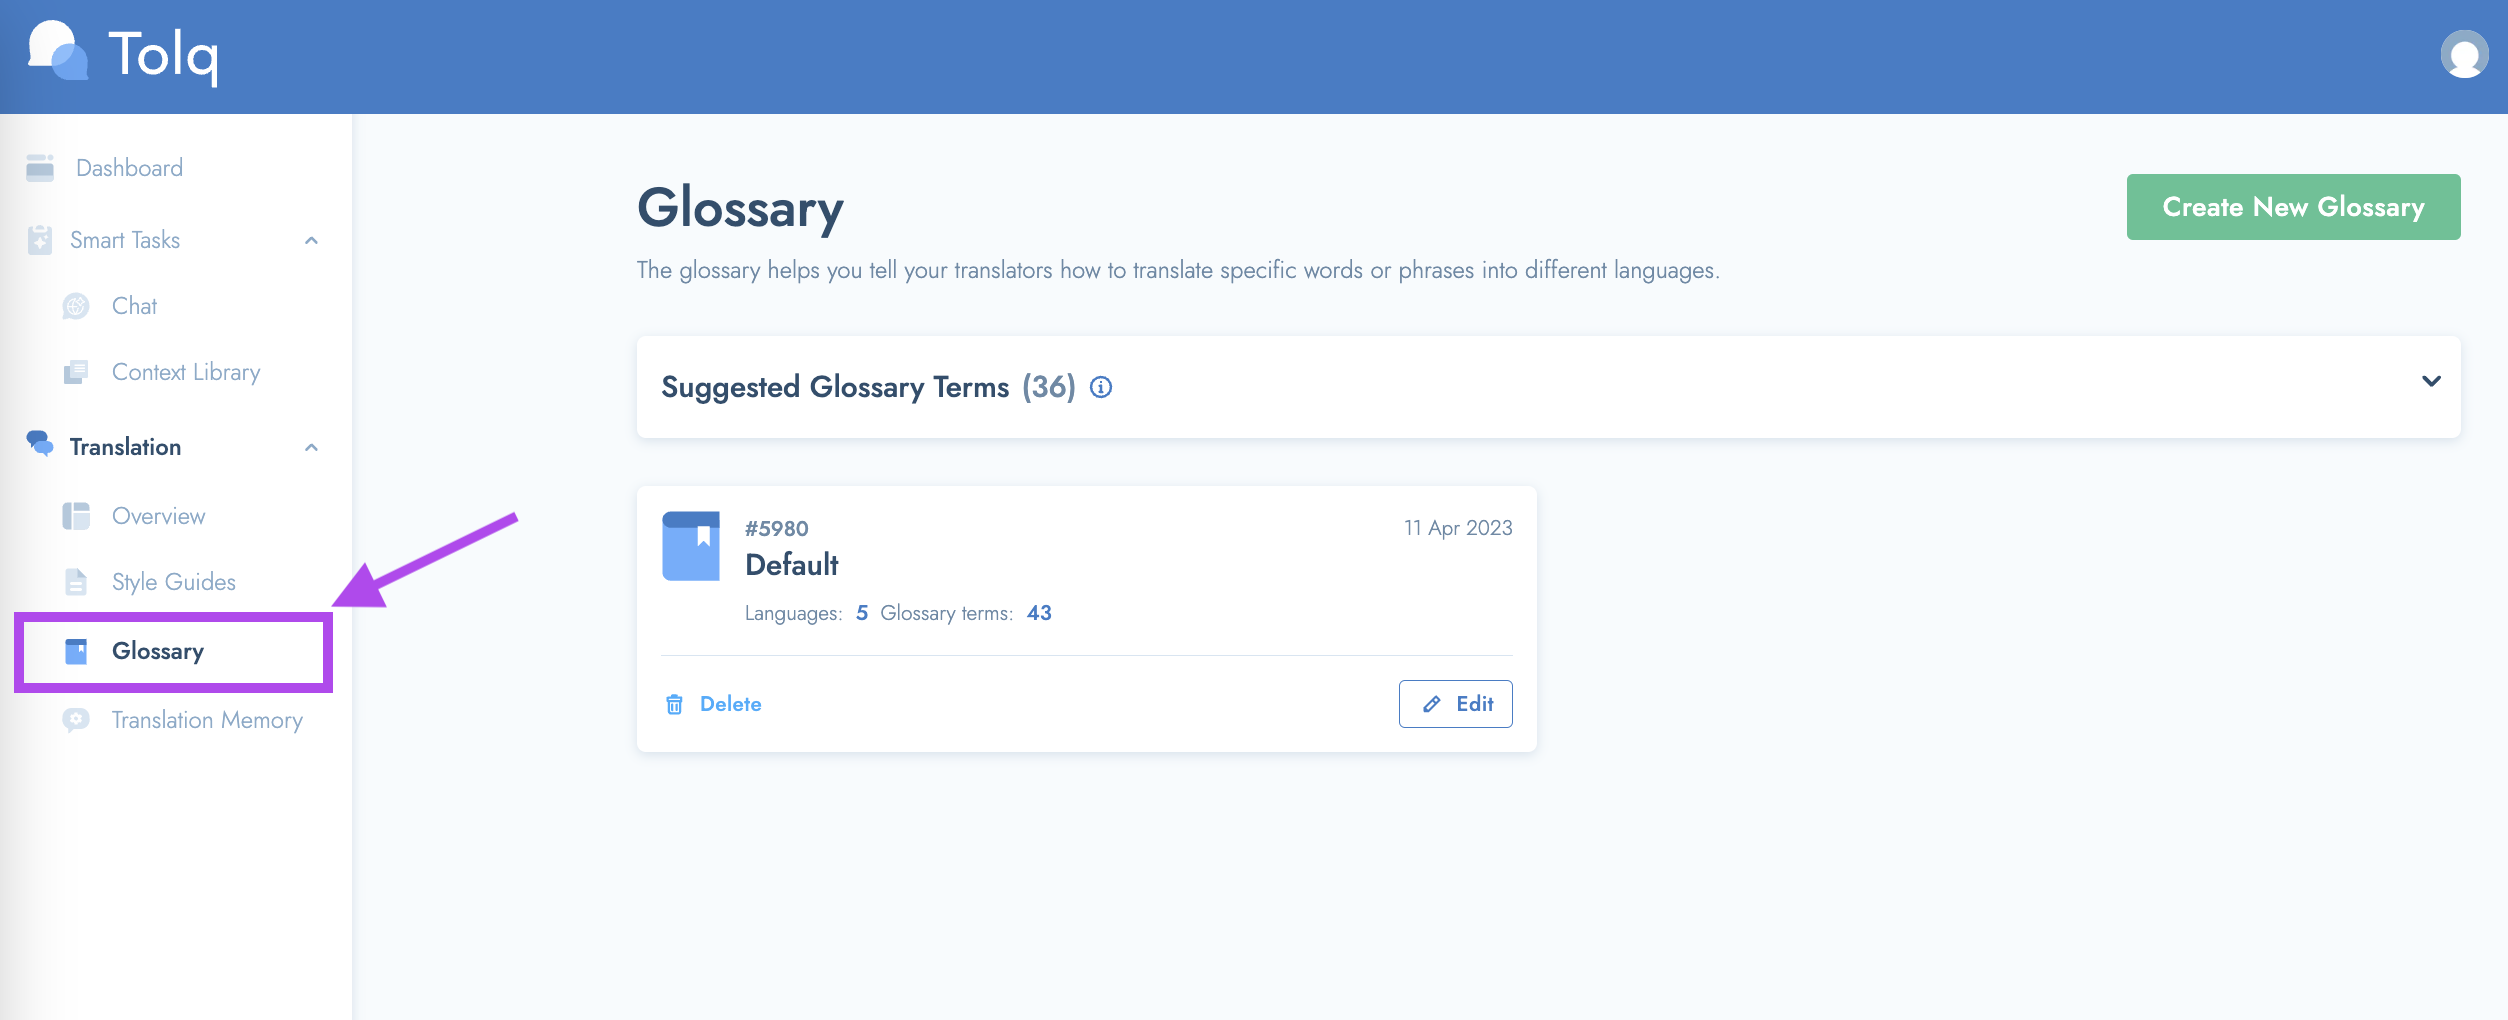
To get started, navigate to the "Translation" section in the menu bar on the left. Click to expand and then select "Glossary".
You will see this welcome screen if it is your first time accessing this section. Simply click the “Continue” button to get started!
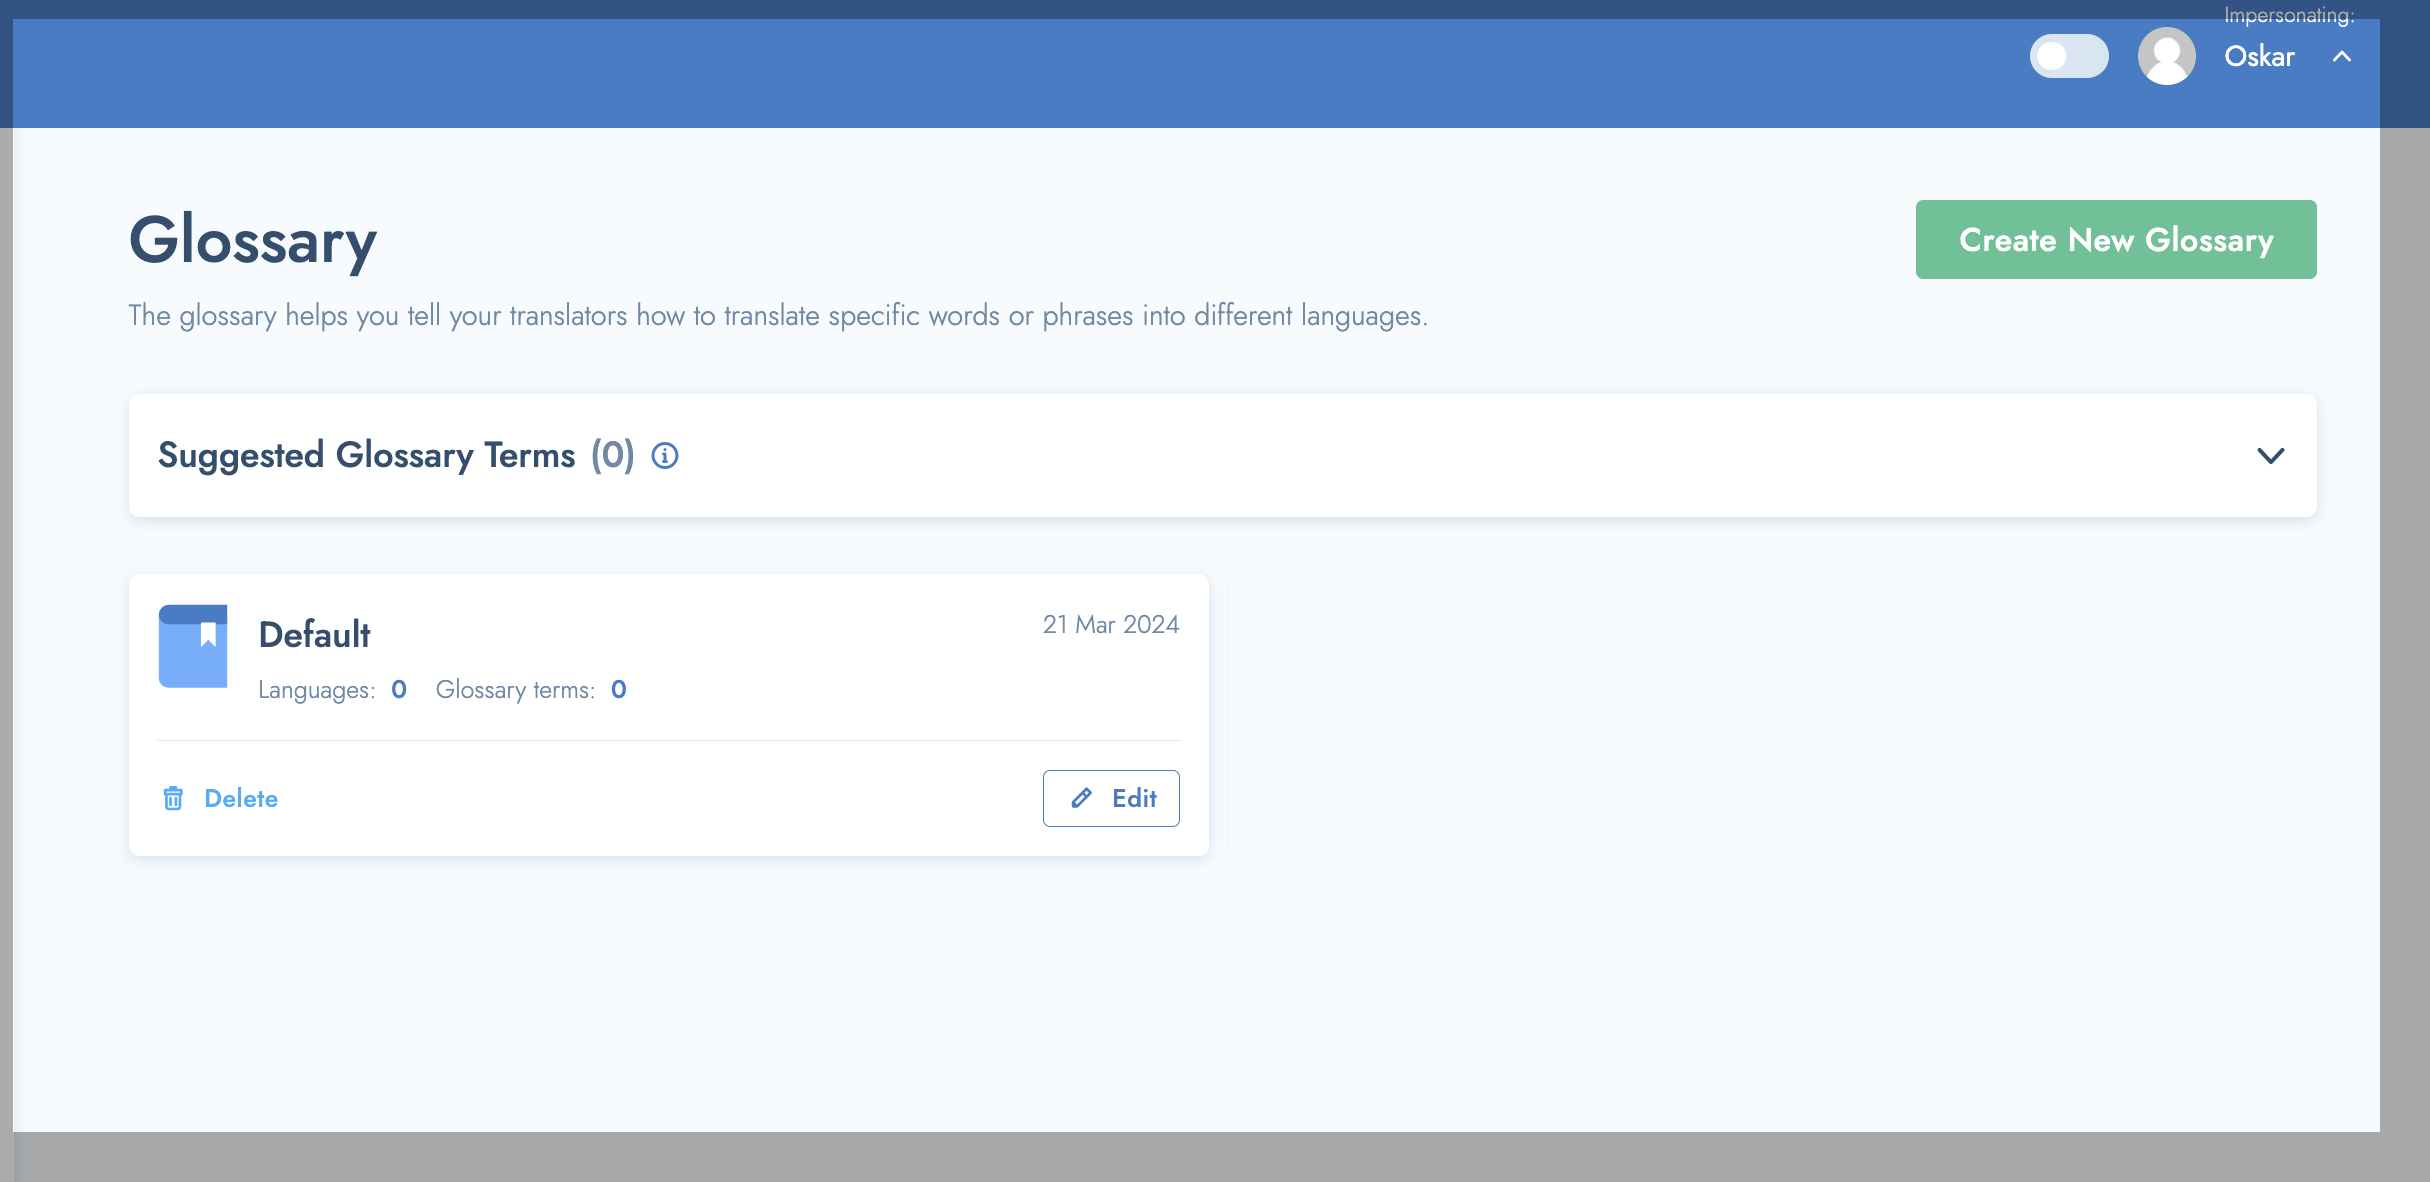
The Default Glossary
- Your account comes pre-equipped with a "Default" glossary, a valuable asset available right from the start. To activate this resource, simply add the languages you frequently use (both source and target) and include at least one term. It's that straightforward.
!! The Default Glossary will be automatically attached to and used for any order you place, unless otherwise specified. !! [We recommend that you use the Default Glossary if you plan to have only 1 Glossary. This one should be your main one.)
- However, you have the flexibility to create additional glossaries and assign an alternative or multiple glossaries to each order that you place.
- This empowers you to tailor your translation preferences, ensuring a seamless and precise experience.
Editing your default Glossary
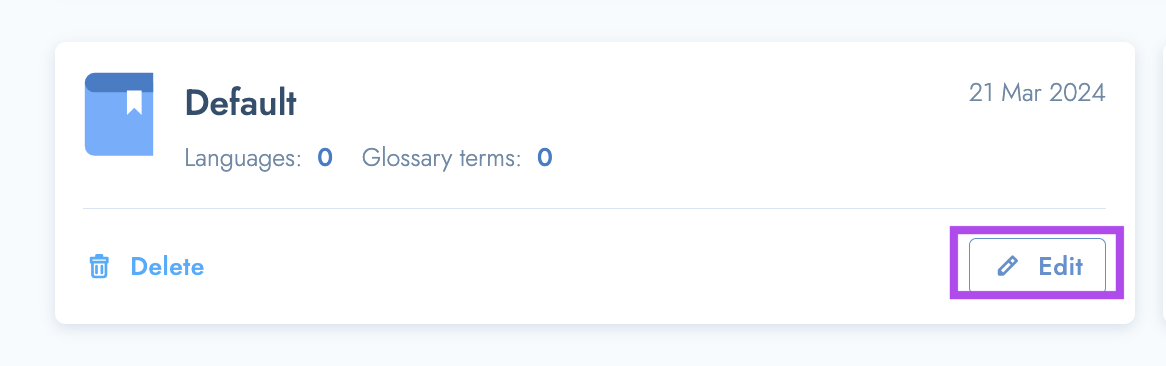
- Editing the default Glossary is is easy.
- Simply click on the "Edit" button to get started.
- Now, give this Glossary a name by editing the current name which is "Default". You can name your glossary anything you like.
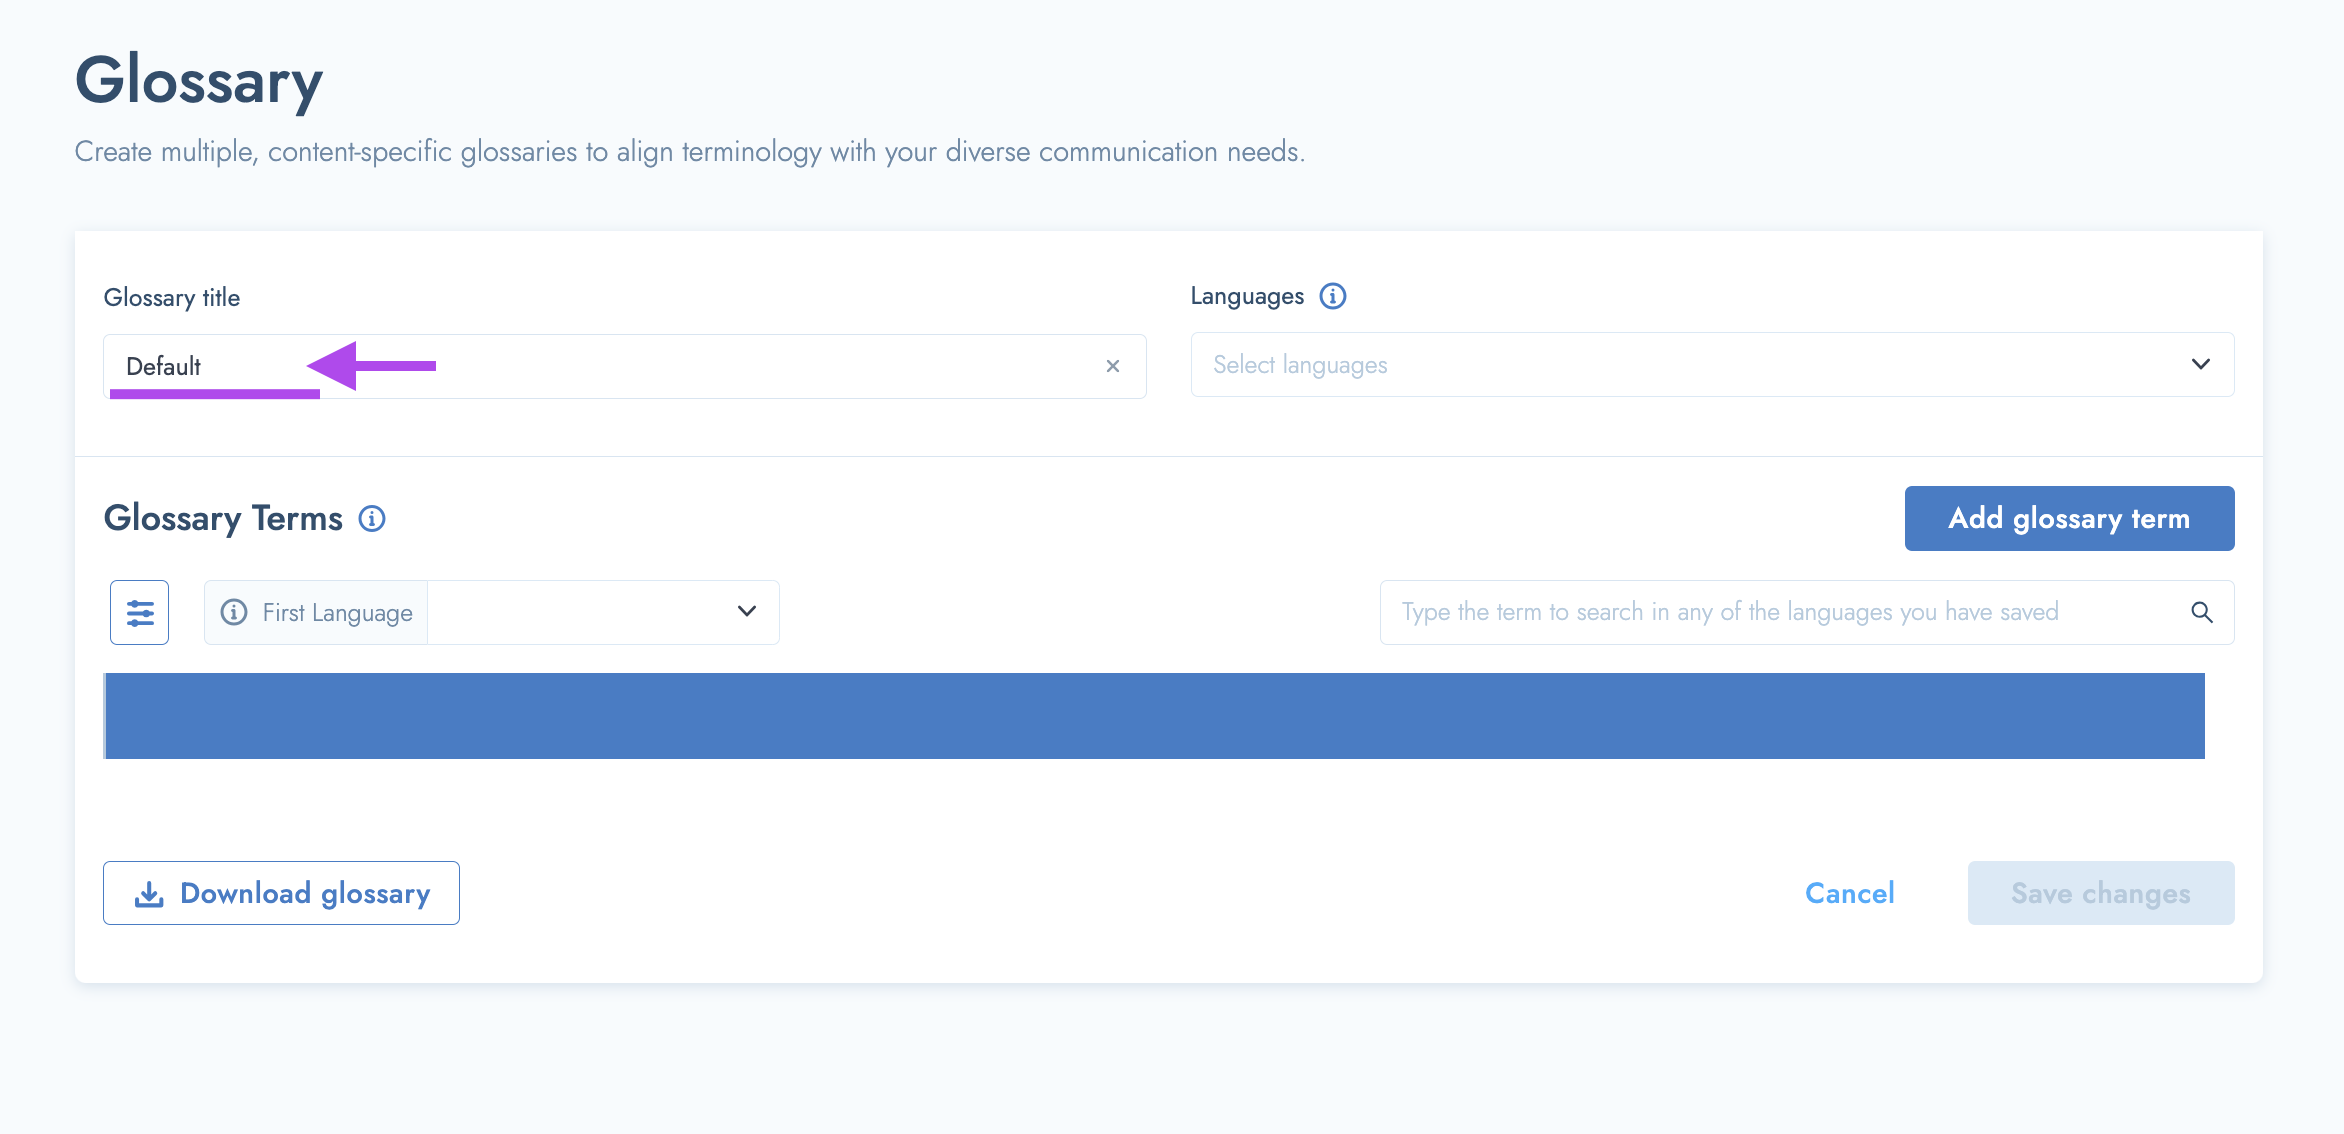
- Once you've named your glossary, you can start to add languages. You need a minimum of 2 languages and one term.
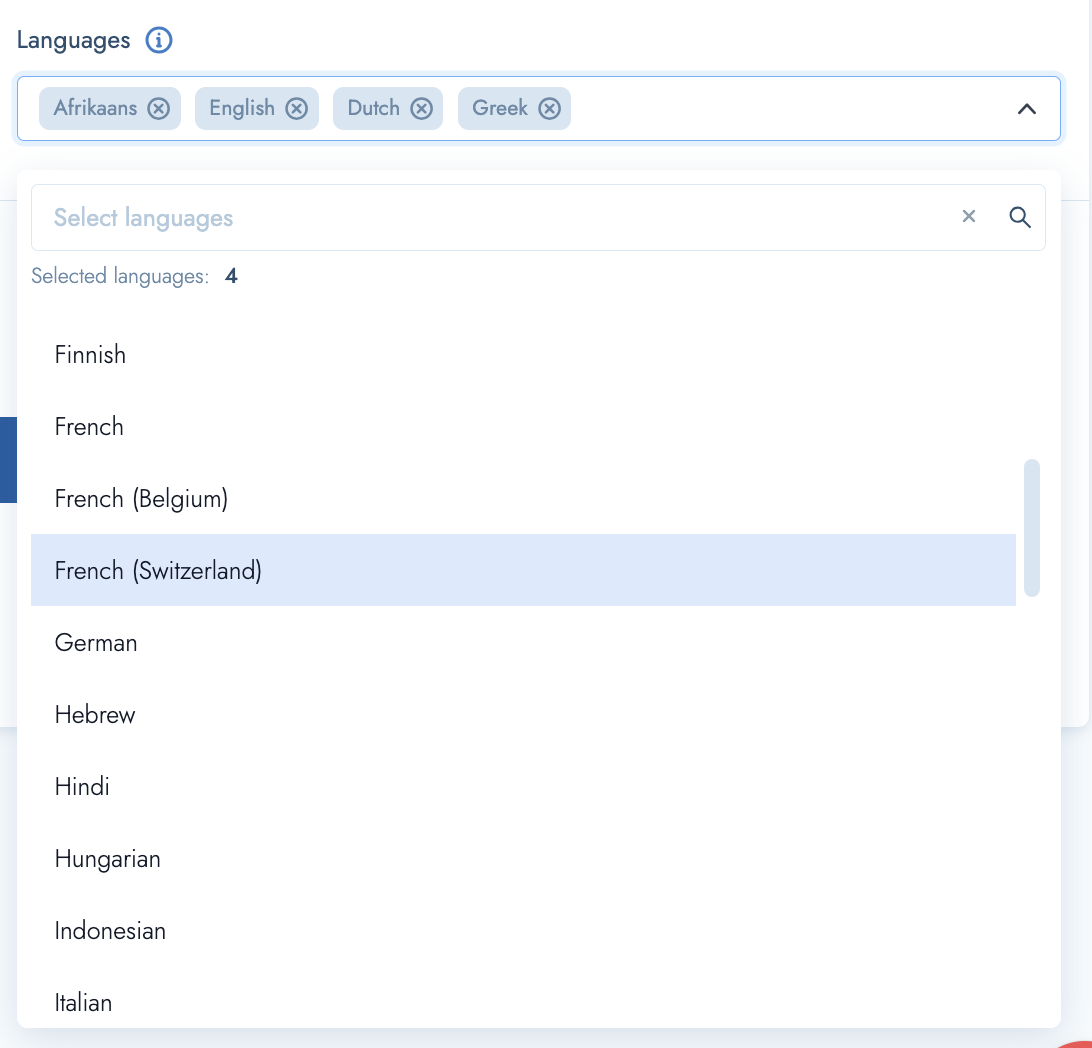
- To start adding languages to your glossary, click the "Language" drop down button.
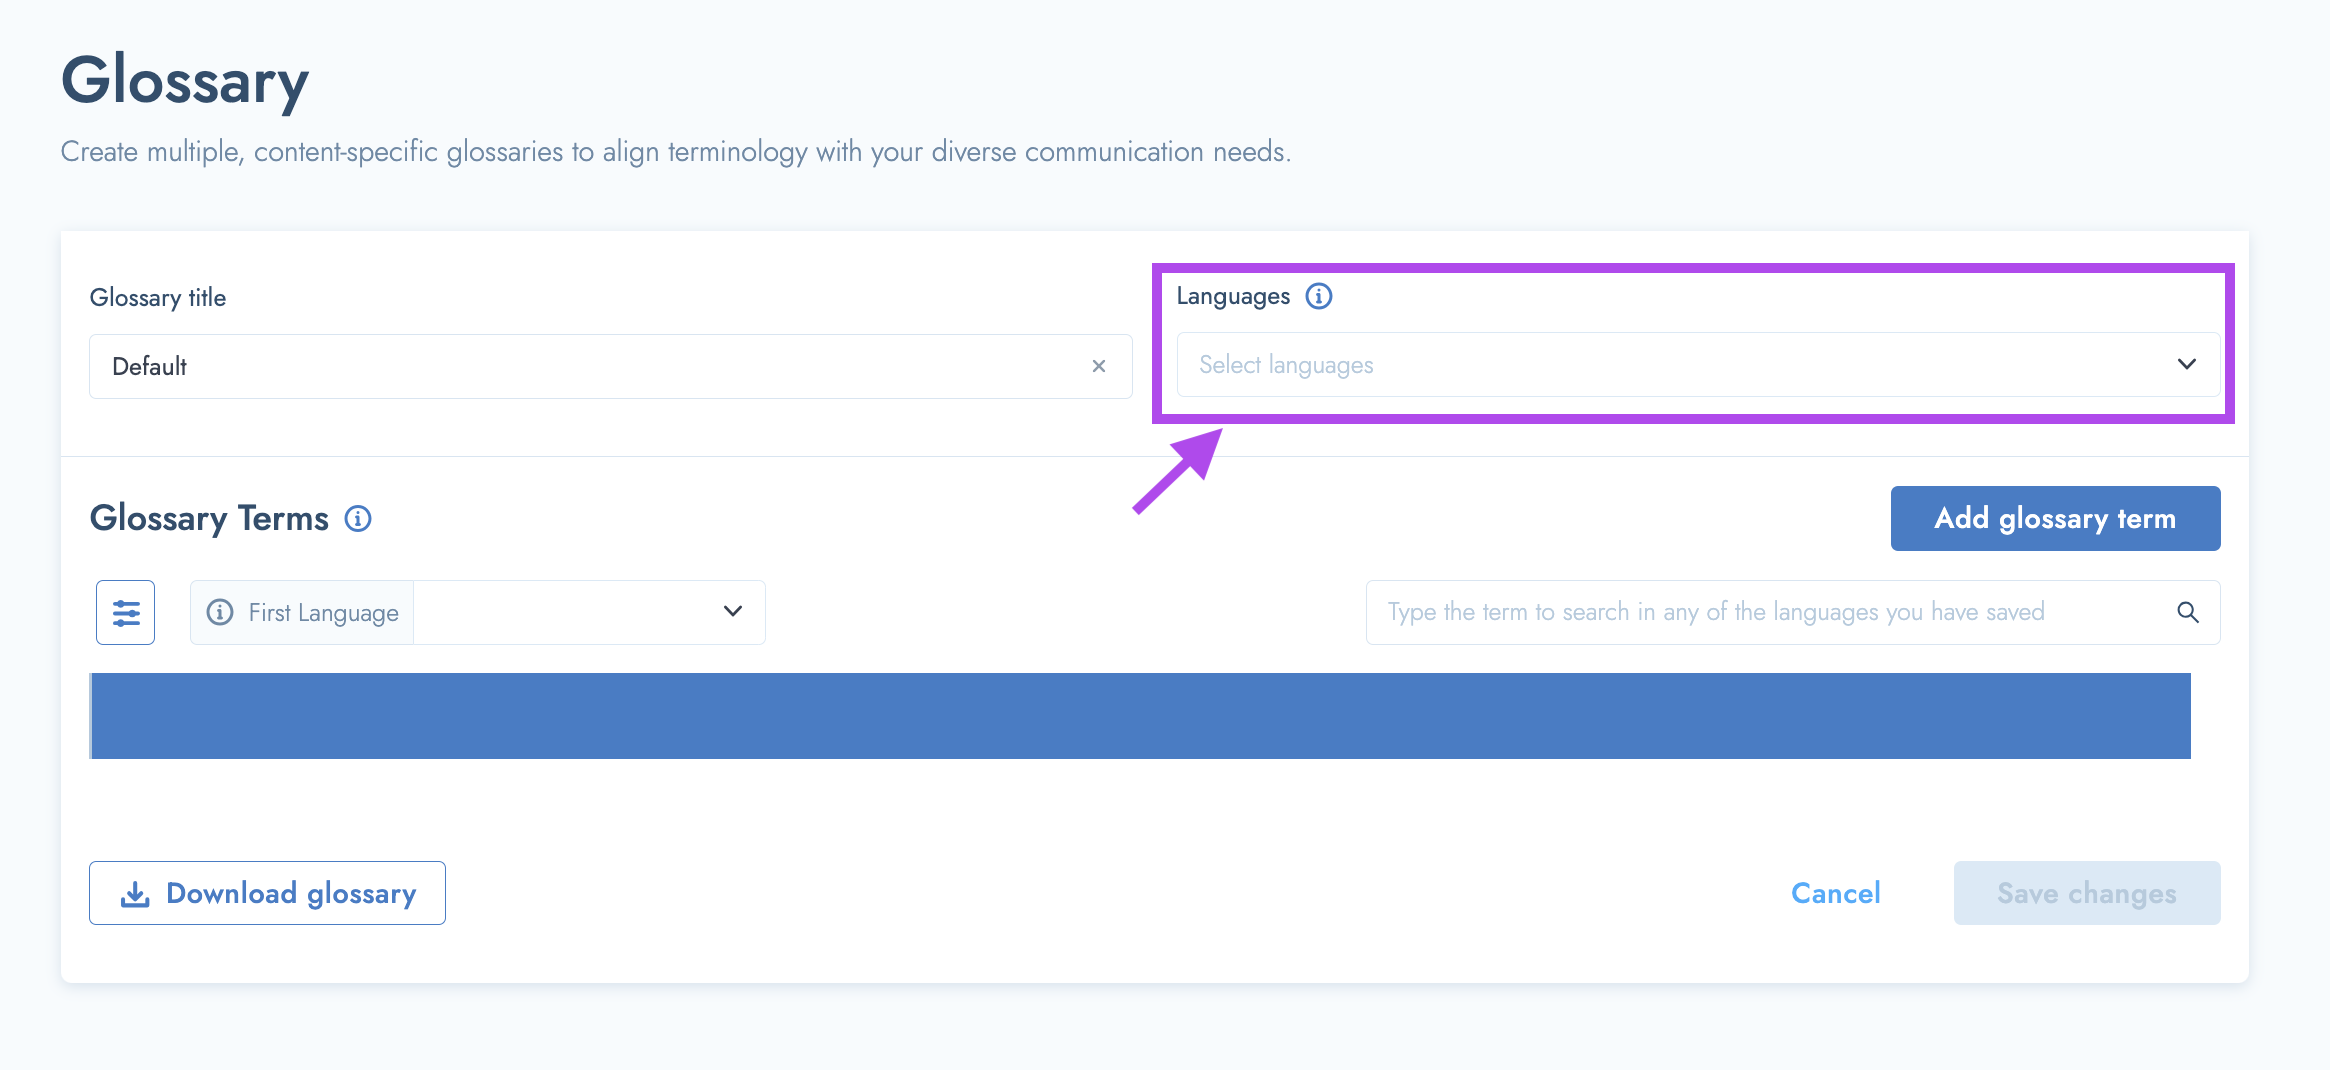
- Now, select a minimum of 2 languages to get started. You can select as many languages as you’d like. These should be the languages that you will be translating from and to.
- If a desired language is not on the list - please reach out to your Tolq account manager or to our support team a customerservice@tolq.com.
- Once you've added your desired languages, you can start adding your terms for each.
- To add a new term, simply click on the "Add Glossary Term" button

- The next step is to start adding your Glossary terms. Input a minimum of 1 glossary term that you wish to include.
- Add the relevant terms for the respective languages. Ensure you provide accurate terms for each language.
- Moreover, utilise the Glossary to specify terms or words that should remain unchanged during translation.
- If you opt for this, make sure to enter the same word or term in the corresponding fields for other languages.

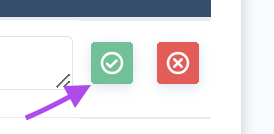
- When you are done adding your terms, you can save by clicking the "check mark"
- And remember to save any changes by clicking the “Save Changes” button.

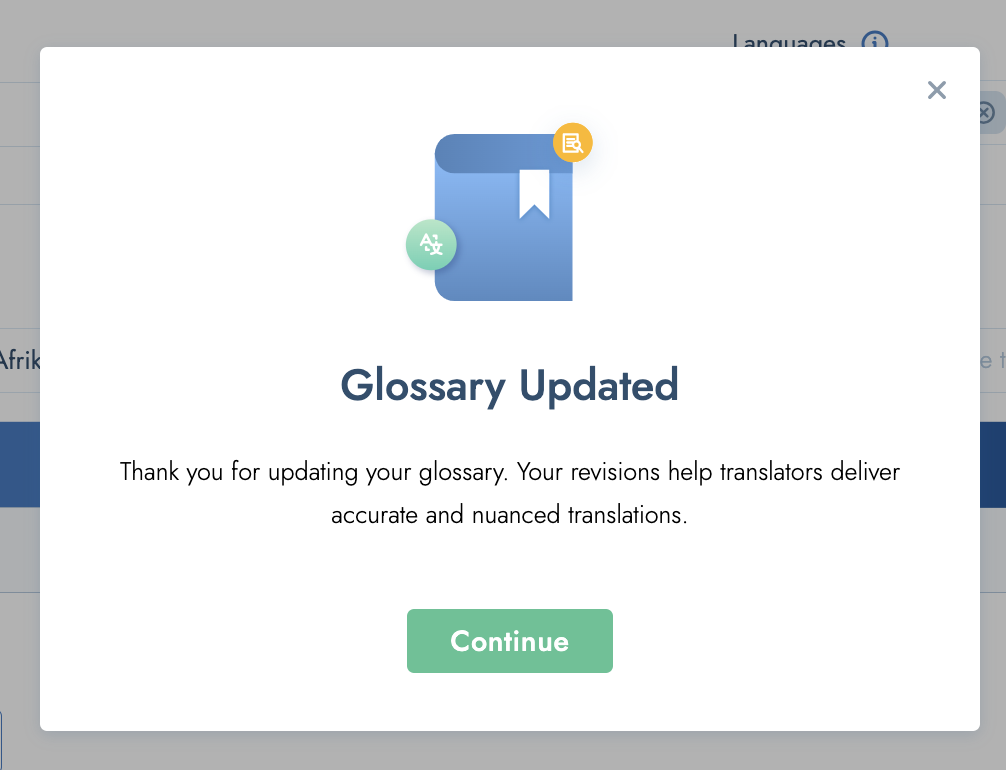
You have now successfully edited the default glossary.
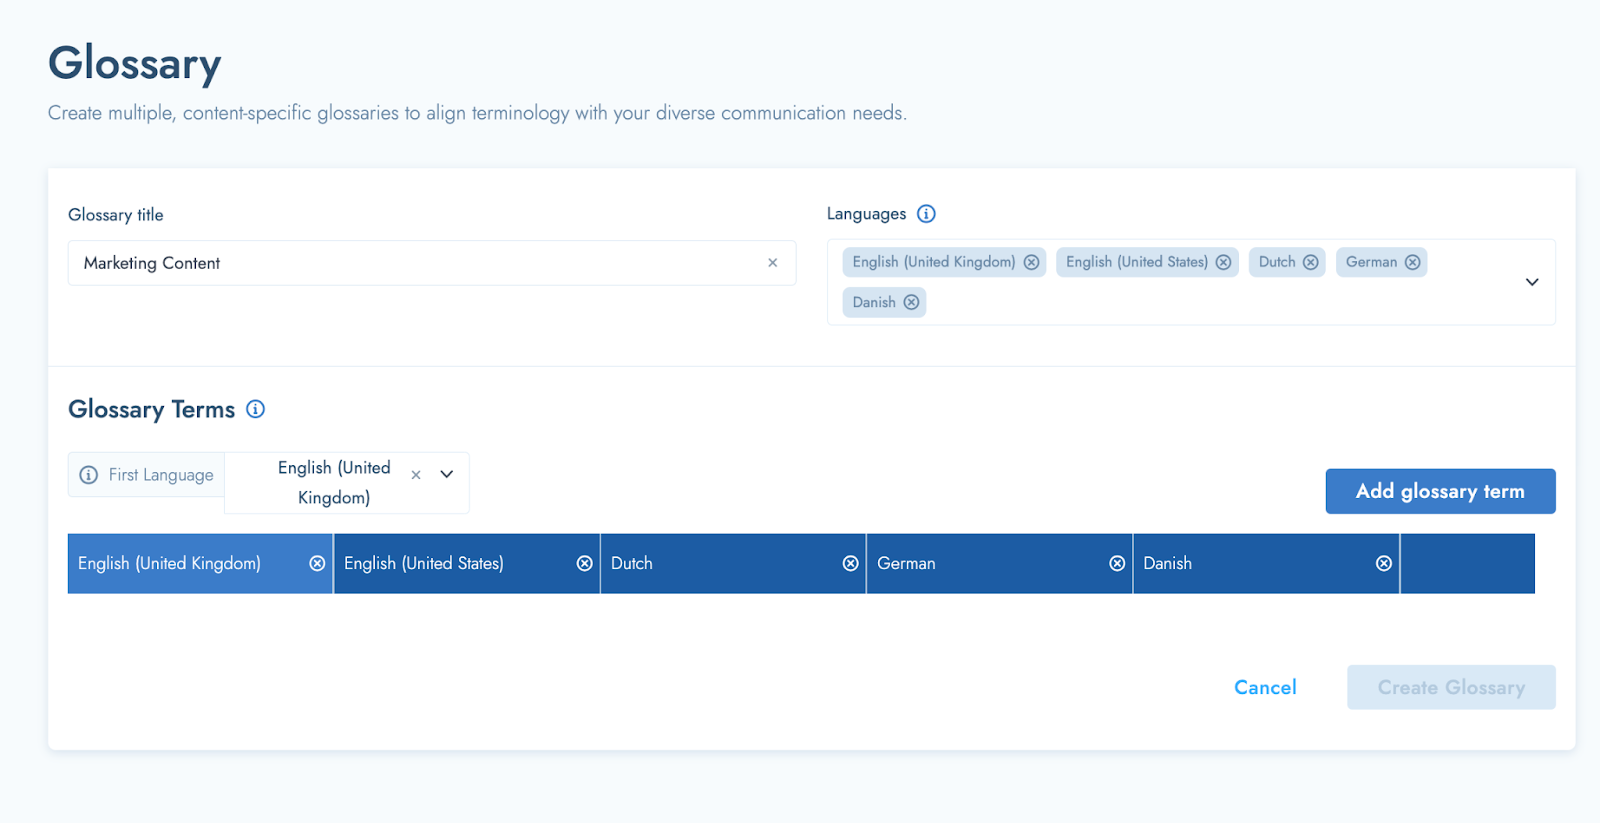
How to create a new Glossary
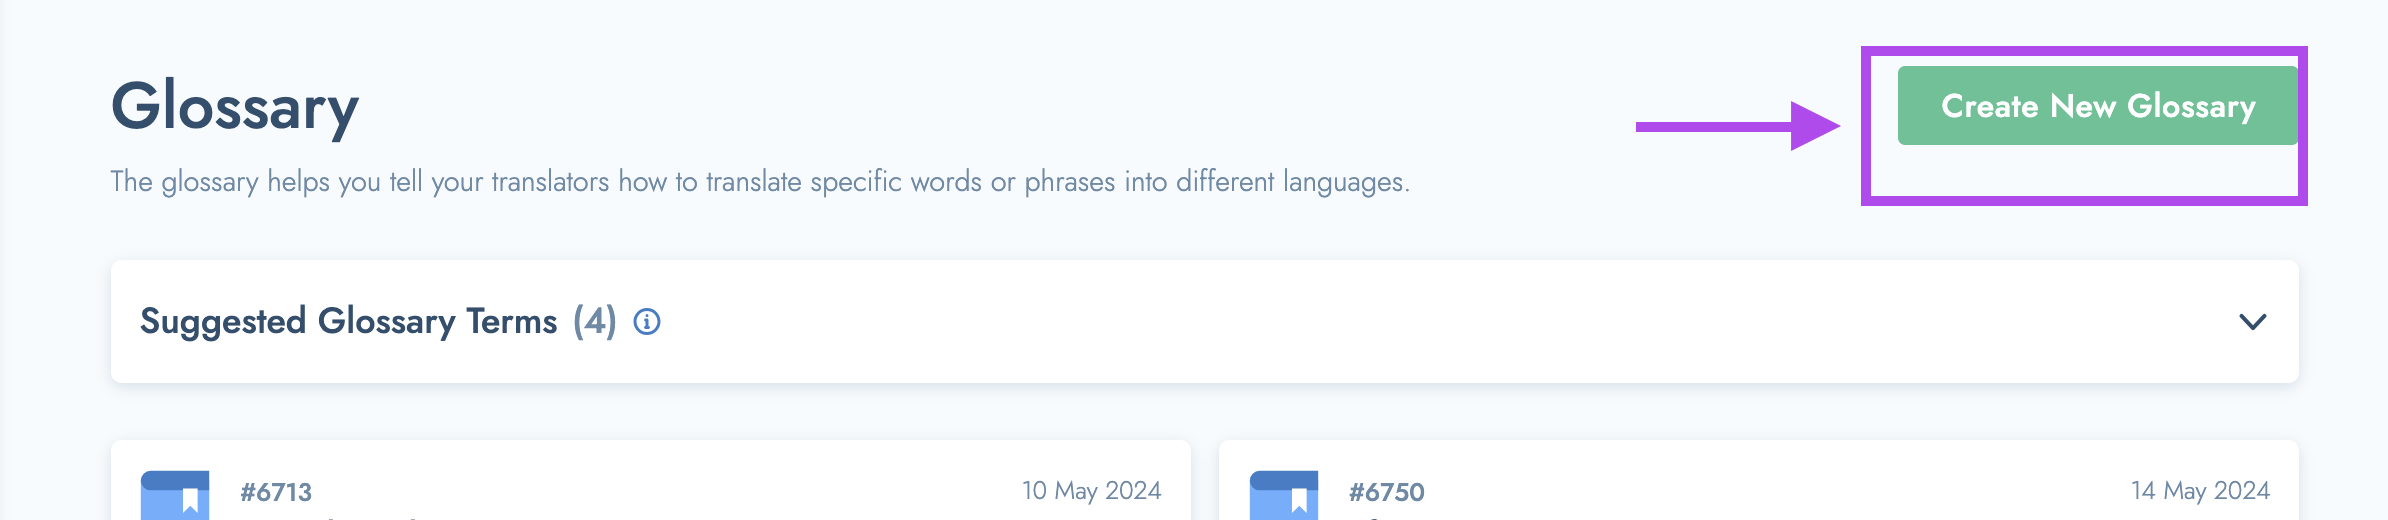
- Select the "Create New Glossary" button.
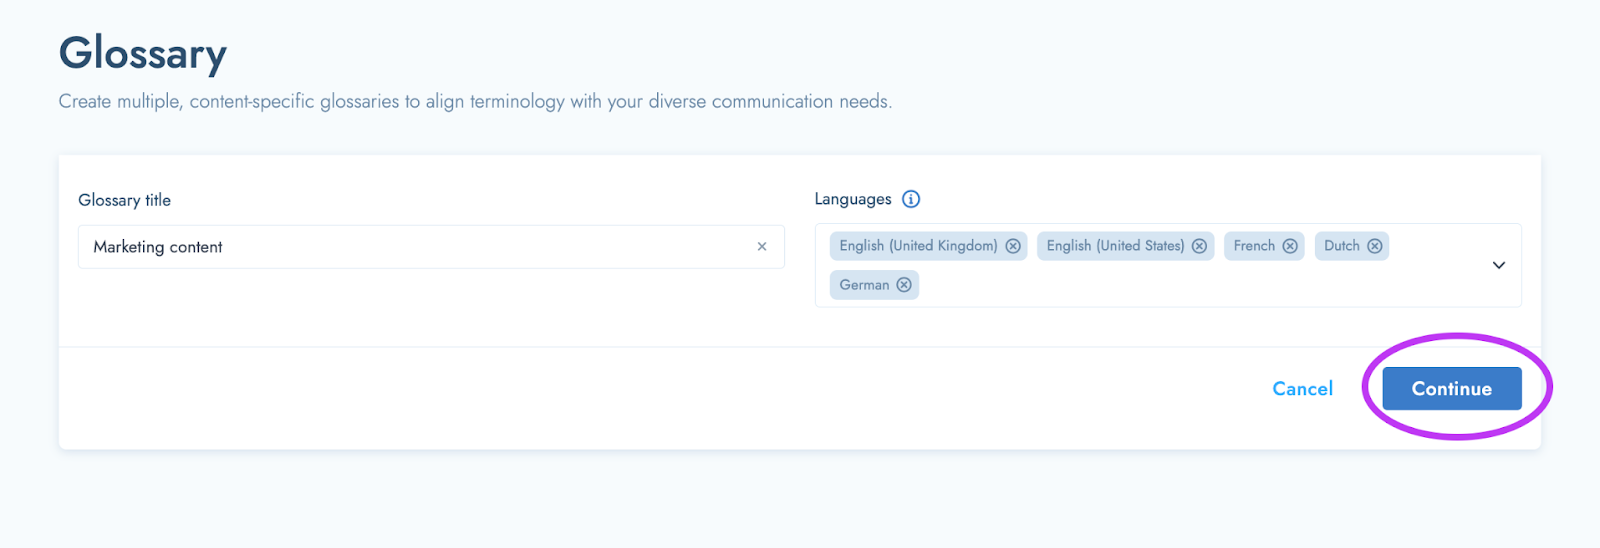
- Give your Glossary a Title.
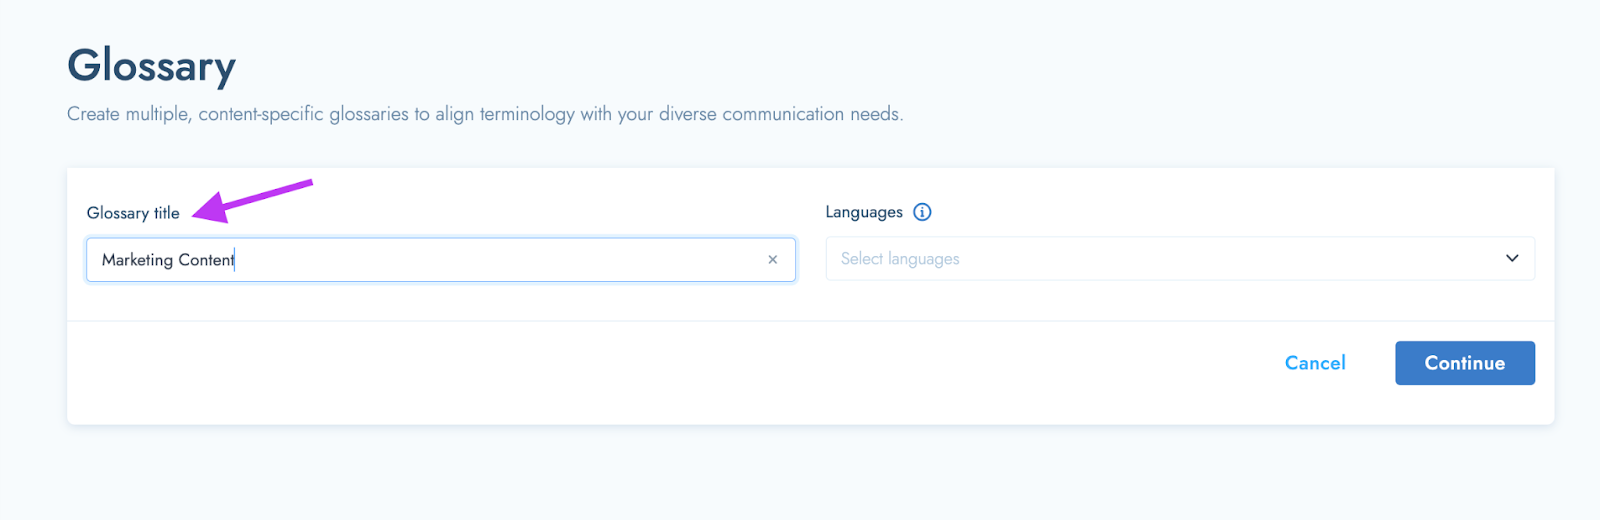
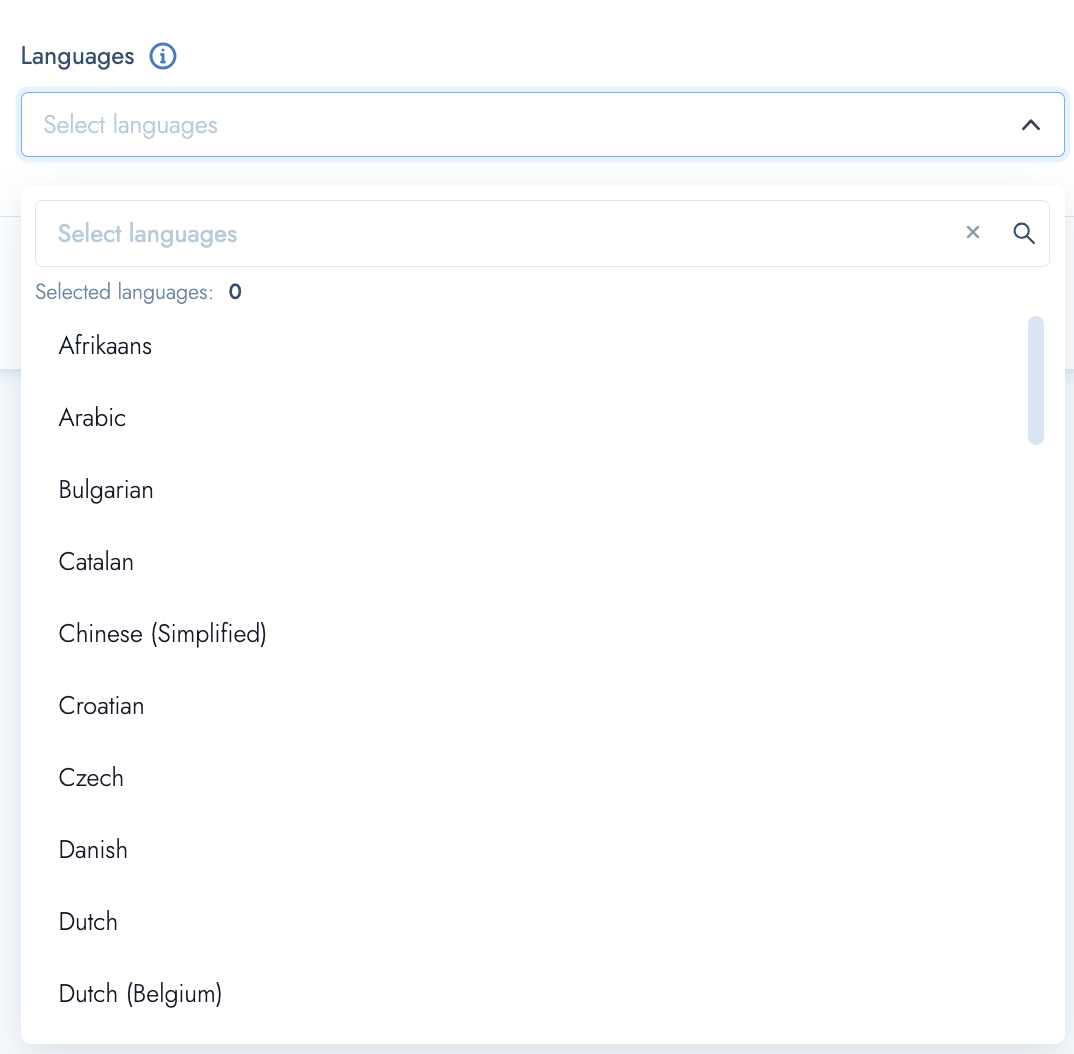
- Now, select the languages that you would like to add by clicking the “Languages” dropdown and adding the languages that you will be translating from and to.
- You need to add a minimum of 2 languages.
- After selecting your languages, click the “Continue” button
- After clicking “Continue” you will see the Columns for each added language. It will look something like this:
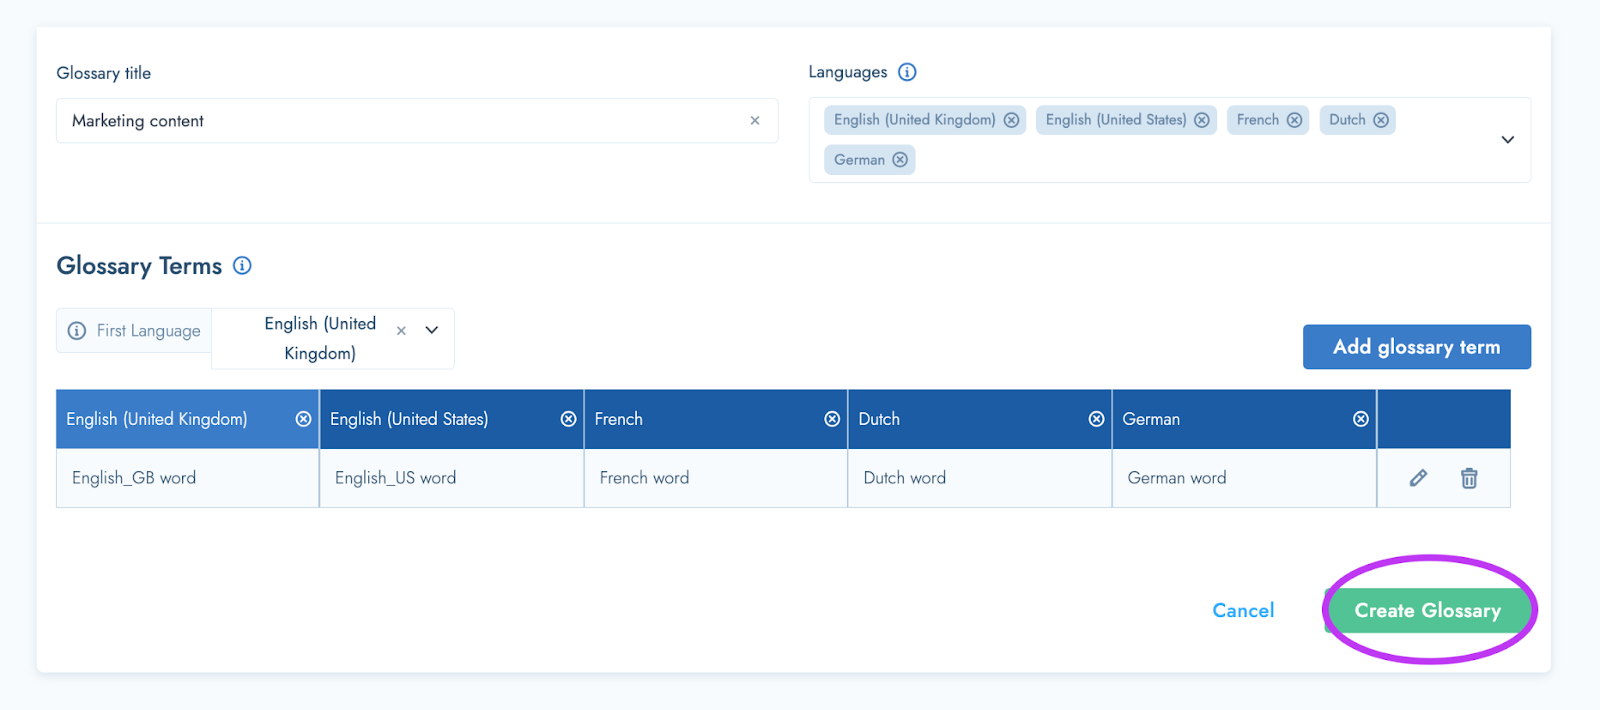
The next step is to start adding your Glossary terms. Input a minimum of 1 glossary term that you wish to include.
- Ensure you provide accurate terms for each language.
- Moreover, utilise the Glossary to specify terms or words that should remain unchanged during translation.
- If you opt for this, make sure to enter the same word or term in the corresponding fields for other languages.
- To add term, simply click the “Add Glossary Term” button

- Next, enter the correct Glossary term(s) for each language - you need to add a minimum of 1 term for 2 languages to get started.

- When you’ve added all of your terms, click the green tick mark to confirm and save.
- Once you’ve done this, you can now create your Glossary by clicking the “Create glossary” button.
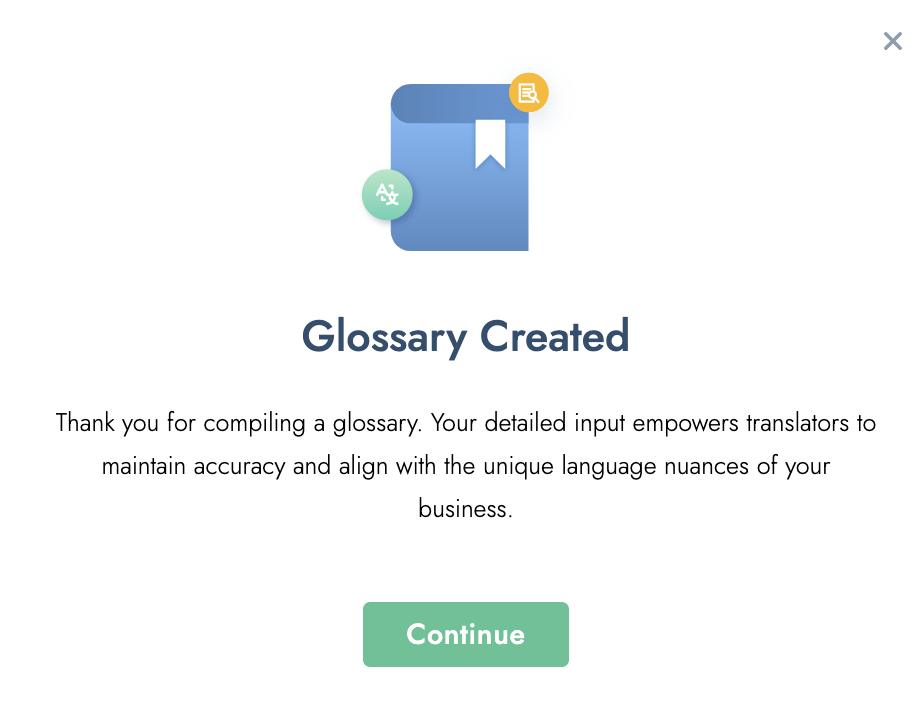
- You will get this message when you have created the Glossary successfully
Visible languages in the Glossary & viewing languages in your glossary
- There are a few features that will allow you to view your Glossary in different ways.
- In order to minimise the number languages you are looking at, you can do the following:
- Select the toggle button/icon
- Now you can select and deselect languages, based on what you would like to do. Languages that are de-selected will be temporarily hidden from view.
- For Example - in the below example, only English (United Kingdom) and English (United States) have been selected.
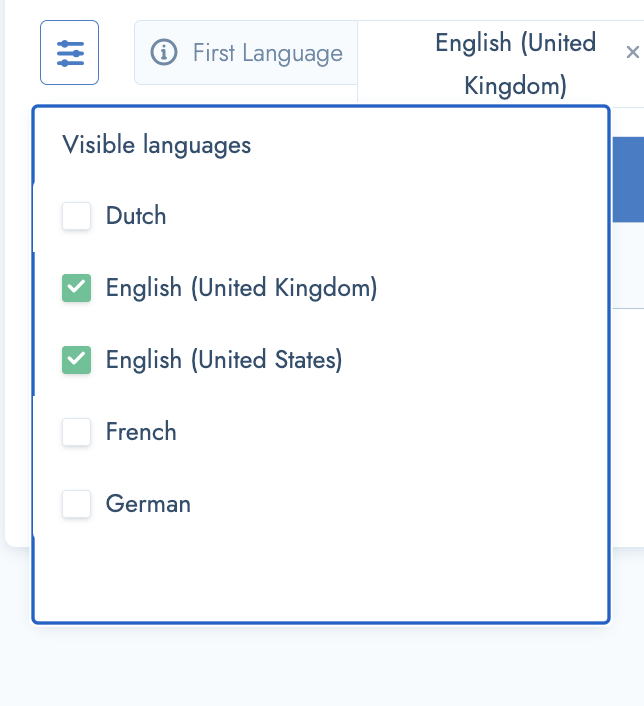
- This means that only English (United Kingdom) and English (United States) will be visible.

"First Language" functionality
- Next is the “First Language” functionality.
- The 'First Language' will be displayed in the first column of the glossary and will remain visible as you scroll through other languages.
- For example, If the first language selected is German, German will appear on the very left hand side. (see screenshot below)
- The “First Language” column will remain frozen while scrolling to other languages towards the right.

IMPORTANT things to note/Additional Information:
- You can create as many Glossaries as you need.
- You can amend and edit any of your Glossaries at any time.
- There is no limit to neither the number of languages nor the number of terms you are able to add. Our system will match all words or phrases in one row bidirectionally.
- You are not limited to single words: you can enter word clusters, sentences, expressions and so on. Our system will make a one-to-one match.
- One language may contain two or three synonyms, which you want to translate to only one equivalent in the other language, or vice versa.
- This is also possible with our glossary. Just make sure you use two different rows when you include several synonyms.
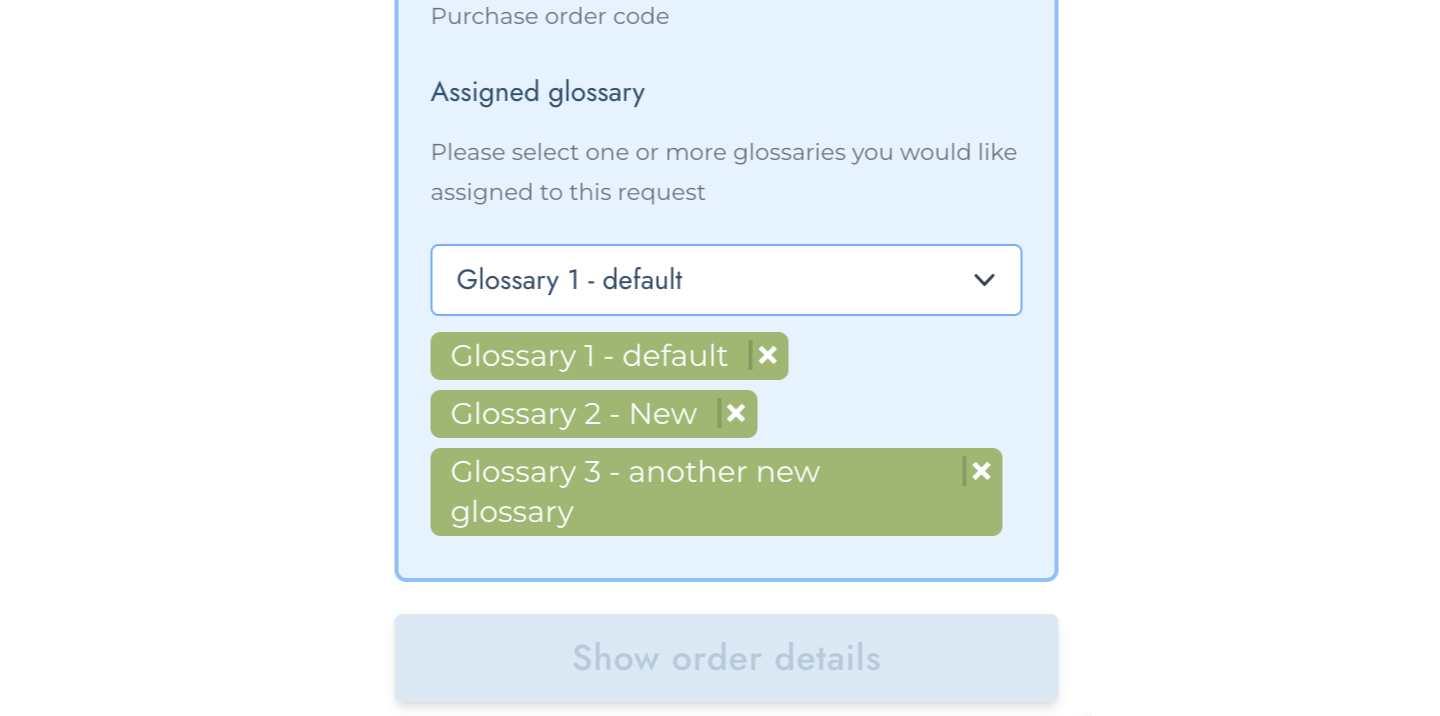
- You can attach more than one glossary to a Translation Request/Order - Simply select all of the Glossaries that you want to attach, in the "Advanced Options" preferences settings when placing your order.
Glossary Terms Suggested by the translators
- The translators have the ability and capability to suggest terms that they recommend to be added to your Glossary(ies). They can do so as they are working on your translations.
- For these terms to become part of any of your Glossaries, they need to be 'approved' by an admin user.
- It’s also necessary to indicate which Glossary they should be added to.
These steps below outline the process on how to review and approve the suggested glossary terms added by the translators. As well as how to add them to your Glossaries.
How to Approve suggested glossary terms and assign them to a Glossary
- navigate to the "Translation" section in the menu bar on the left. Click to expand and then select "Glossary".
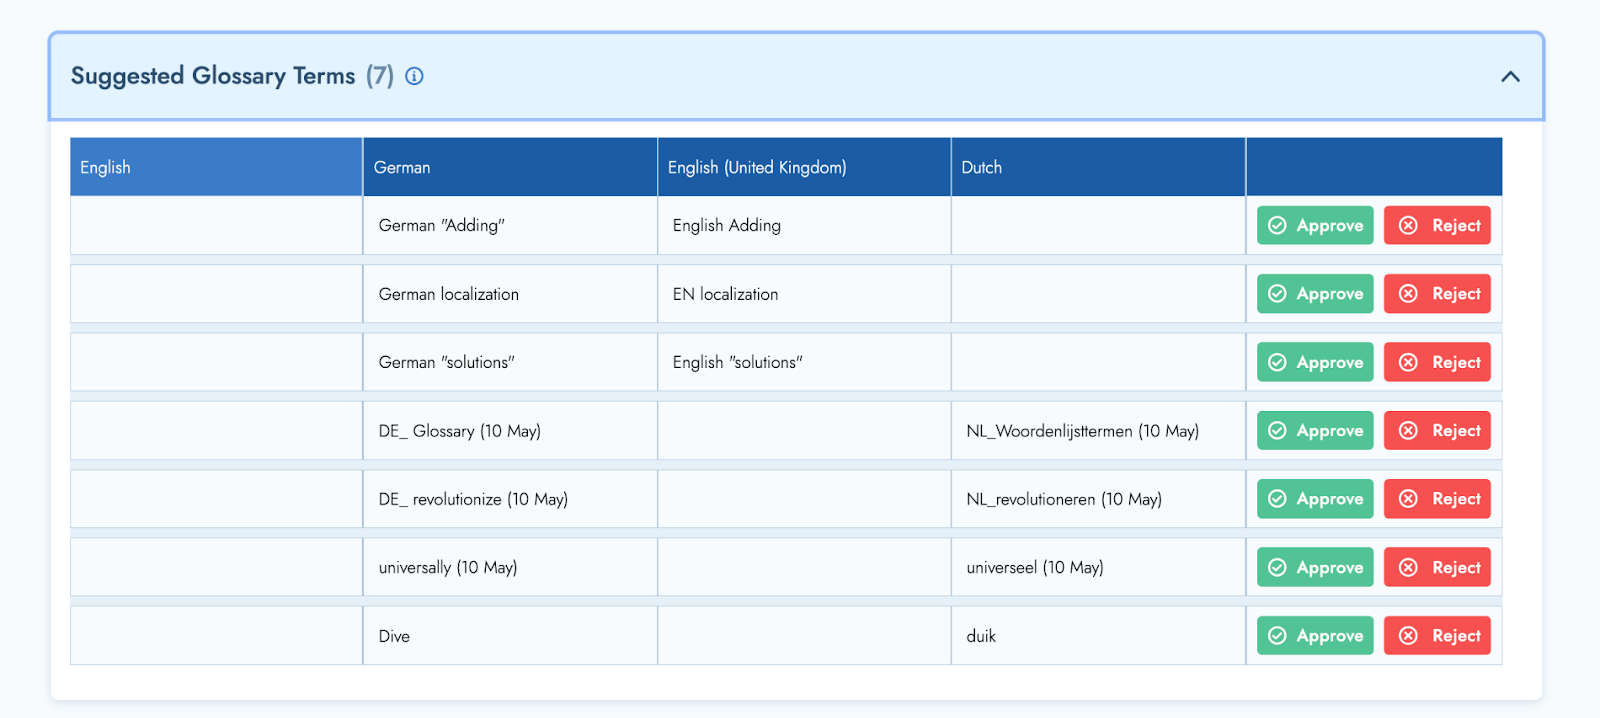
- You will see the “Suggested Glossary Terms” section at the top.
- Any terms that have been suggested by translators will appear here.

- To view the Suggested Glossary terms, click the drop down menu arrow.

- You will now see the Suggested Glossary Terms.
Rejecting Suggested Glossary Terms
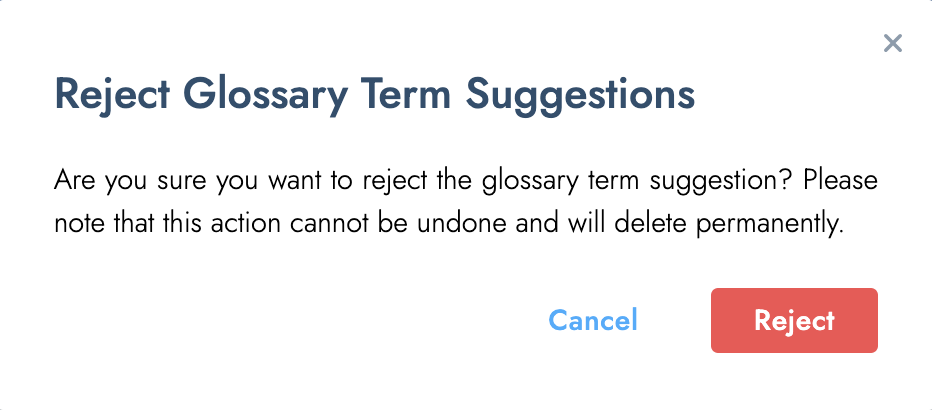
- To reject or deny a suggested glossary term, simply select “Reject”.
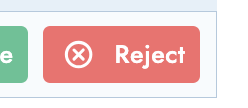
- Then confirm the rejection and you’re good to go!
Accepting Suggested Glossary Terms & adding it to your default Glossary
- To Accept and approve a suggested glossary term, simply select “Approve”.
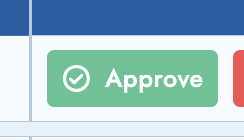
- “Approved” suggested Glossary terms are added to your default Glossary, by default.
- If you are happy with this, click “Continue”
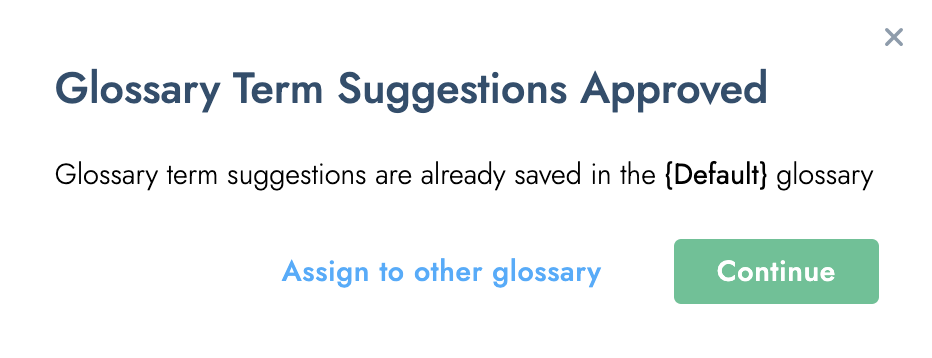
- The suggested Glossary Term will be added to your Default Glossary.
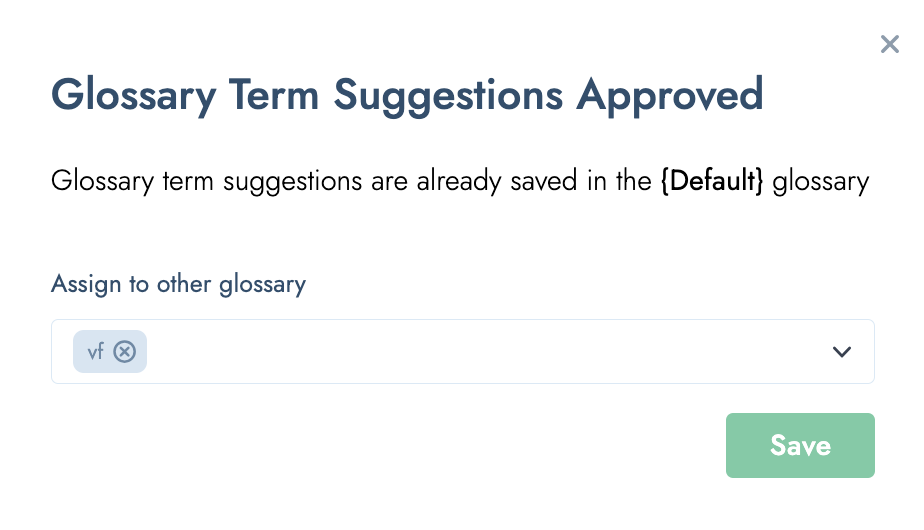
Accepting Suggested Glossary Terms & adding it to OTHER glossaries
- To Accept and approve a suggested glossary term, simply select “Approve”.
- “Approved” suggested Glossary terms are initially added to your default Glossary.
- If you would like to add this term to another Glossary, select “Assign to other Glossary”
- Then select the relevant Glossary(ies) that you’d like to add this term to, from the drop down list.
- Then click “Save”.
- Repeat for all Suggested Terms and you’re good to go!